
Fruit-Collecting Game with Pinoo
Project Purpose: To create a fruit picking game with the joystick module using the Pinoo Control Card.
Duration: 2 lessons
Age Group: 9 years old and above
Pinoo Sets: Maker set and full set.
Benefits:
- Learns to code Pinoo control card
- Learns to code the joystick module.
- Improves the skill of setting up algorithms.
- Improves coding skill.
Materials to be Used: Mblock 3 program, Pinoo control card, Joystick Module, Connection cables

Materials Required for Design: Cardboard, Color Cardboard, silicone gun, scissors


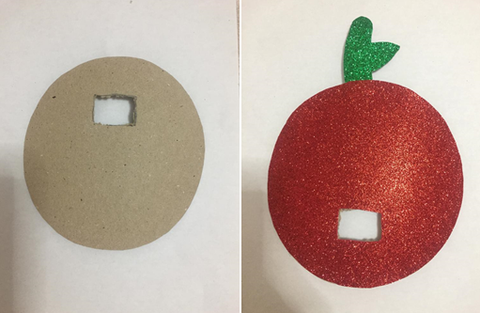

We fix the Pinoo board to the back of the apple and make the connections.
We pay attention to the colors on the module for our joystick connection. We make our connection to the red-yellow input (number 9), which has the same colors on the Pinoo card.


In the coding part, we will first design the game. For this, we delete the panda by clicking the right mouse button on the panda puppet. Then, by clicking the new dummy button, we add three fruits and a puppet named button2 (this will be our dummy basket).
If you wish, you can change the background by clicking the select the decor from the library button.


If the button 2 (basket) touches the puppet with fruit (fruit has been collected), the score variable is increased by 10 and the fruit moves up and down (from 180 y position) within the stage. We want all these operations to be continuous.
From the control tab, we get the repeat code block and the block if it is. If the block touches the condition field button2 (basket), we get the is it worth command from the detection tab, and select and place button2 from the drop-down menu.


We will provide the movement of our basket, that is button2, with the values that the joystick takes on the x axis. To learn the values, we create a new variable named x from the Data & Block tab.
To indicate that the variable X is constantly equal to the value from the joystick, we take the repeat block from the control tab, the code block from the Data & Block tab to get x 0, and place the code block related to the joystick from the Robots tab instead of 0.

In order to determine the threshold values of the joystick movements (x), we need to determine the values that the joystick takes on the far right, stationary and leftmost.
• The values for the far right (the forward movement of the puppet) approach 1023. An average value of 600 was determined.
• Its steady state is approximately 500,
• For the far left (backward movement of the puppet) the values approach 0. An average value was determined as 300.
You can update these values according to your own game.
Now, let's create the necessary condition states for all these threshold values. From the Control tab, if the block is and from the operations tab, we create the condition statement by taking the block is smaller and greater than.


When the green flag is clicked, that is, when the game starts, we want the time to be 0 and then the time to increase continuously with 1 second intervals.

If the time is equal to 30, we want the game to be written on the screen and the game to stop.
For this, we get the expression if if from the control tab and equals from the operations tab. In case of fulfillment of the condition, we take the hello 2 sec command from the view tab and the stop all block from the control tab. We change the hello to GAME OVER.

After completing our codes, we check the operation of our game by clicking the green flag.
• Our time will start to increase with the start of the game,
• The basket should move to the right when we pull the joystick to the right, and to the left when we pull it to the left
• Our score should increase when fruits touch the basket,
• When the time is equal to 30, the game must be over.

WITH PINOO SETS, CHILDREN CAN MAKE HUNDREDS OF PROJECTS WITH MATERIALS THEY CAN EASILY FIND IN THEIR HOMES.