
Mouse Trap With Pinoo
Purpose of the Project: To make a system in which the mouse will be detected and the door will be closed by using the Pinoo control card, servo motor, light sensor (LDR) and buzzer module when the mouse enters the box we made.
Duration: 2 lessons
Pinoo Set: Basic, Invention, Maker, Full Set.
Age Group: 11 years and over
Gains:
• Learns to code Pinoo control card.
• Learns to use a light sensor.
• Learns to use buzzer module.
• Learns to use servo motor.
• Improves the skill of setting up algorithms.
• Improves coding skill.
Materials to be used: Mblock 3 program, Pinoo control card, servo motor, buzzer module, light sensor (LDR), connection cables.

Materials Required for Design: Dekota, utility knife, fine and thick wire, silicone gun and silicone.

Project Preparation:
For our project, we start by cutting our decota first.

We cut our decota into pieces like in the picture.

Then we will use thin wire to open the door of our mousetrap. For this, we make a hole with the help of a utility knife as in the picture.

We attach our thin wire to the holes to ensure the movement of the door.

Then we make a cut for our light sensor with the help of a utility knife.

We fix our decota parts with the help of a silicone gun as in the picture.
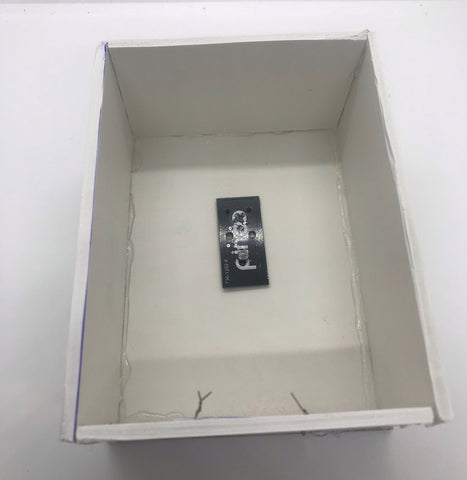
We fix our light sensor to the cut we made on the floor.

We fix our buzzer module on the sidewall of our mouse trap.

Then we connect our thick wire to the brush of our servo motor and fix the wire that we connect the servo motor to the wall of the mousetrap. Then we make the connections on our Pinoo control card. We connect our servo motor to gate number 2, buzzer module to gate number 3, and our light sensor to gate number 7.
- Adding Pinoo extension:

From the Extensions tab, we click on the "Manage Extensions" option.

In the window that opens, we type "Pinoo" into the search engine and simply say ‘download to the result’.
It was installed on our computer.
- Connecting the Pinoo sensor board to the computer:

In Mblock 3, we click on the "Connect" tab on the upper left.

We click on the "Serial Port" section from the window that opens and select the "COM6" option from the page that opens.
NOTE: Since the port entries of each computer are different, the numbers next to the COM text may change.

We click on the Cards tab.

We select the "Arduino Nano" card option used by the Pinoo sensor card from the window that opens.

We click on the Extensions tab.

In the window that opens, we select the extension "Pinoo" of the sensor card we use.

We click on the Connect tab.

We click on "Firmware Update" from the window that opens.
- Coding part:

First, we place our servo motor start code under the 'When the Key is Pressed' codes to check whether our servo motor works or not. In this way, we control the working status of our servo motor.

When the green flag is clicked, we control our buzzer module by running it with a sound code under the code.

To find out whether our light sensor is working or not, we can see the values by reading our "read light sensor" code under the "Green Flag" code in the "say hello" code.

We start our code with the green flag code. At first, we set the angle of our servo motor to 0 degrees so that our mousetrap door remains open.

In the continuous repeat code, if our light sensor value is less than 200, we want our servo motor to bring its angle to 135 degrees, that is, the door is closed.

Then, repeat 20 times, we want our buzzer module to run in half-second intervals into our cycle and we complete our coding in this way.

We right click on the "Pinoo Program" command and select the "Upload to Arduino" option in the window that opens.
On the page that opens, we click on the "Upload to Arduino" button selected in red.

Our codes are uploaded to our Pinoo control card.
We click on the "Close" button after the "Download Finished" text appears. After the installation is finished, the battery compartment is inserted and the project is run.

- Working Status of the Project:

If the mouse enters, the light sensor will detect the mouse and our door will close
ARDUINO IDE CODE:
#include <Servo.h>  // Servo kutuphanesi projeye dahil ettik.
Servo servomotor;  // Servo motor nesnesi oluşturduk.
int LDRpin = A0;//Işık sensörümüzün hangi pine taktığımızı belirttik.
int buzzerpin = 3;// Buzzer modülümüzü kaçıncı pine taktığımızı belirttik.
void setup()
{
  pinMode(buzzerpin,OUTPUT);
  servomotor.attach(2);//Servo motorumuzun hangi pine taktığımızı belirttik.
  servomotor.write(0);//Servo motorumuzun başlangıçta 0 derecede olmasını sağladık.
}

void loop()
{
  int isikdegeri = analogRead(LDRpin); // isikdegeri adında bir değişken oluşturduk ve A0 pinine bağladığımız ışık sensörümüzün değerlerini oluşturduğumuz değişkene aktardık.
  if(isikdegeri<200)//Eğer ortamdaki ışık değeri 200'den küçük ise koşul bloğunu oluşturduk.
  {
    servomotor.write(135);//Servo motor açısını 135 derece yaptık.
    for(int i=0; i<=20 ; i++); //Buzer modülümüzden 20 defa ses çıkarması için for döngüsü oluşturduk.
    {
      digitalWrite(buzzerpin,HIGH);//Buzzer modülümüzü aktif hale getirdik.
      delay(500);//Yarım saniye beklettik.
      digitalWrite(buzzerpin,LOW);//Buzzer modülümüzü pasif hale getirdik.
      delay(500);//Tekrar yarım saniye beklettik.
    }
  }

}