
Smart Dryer With Pinoo
Purpose of the Project: To make a smart dryer project by using dc motor, soil moisture sensor and led module with Pinoo control card.
Duration: 2 lessons
Age Group: 7 years old and above
Set Used: Pinoo Full Set
Benefits:
• Learns to code Pinoo control card.
• Learns to use a LED module.
• Learns to use dc engine.
• Learns to use soil moisture sensor.
• Improves the skill of setting up algorithms.
• Improves coding skill.
Materials to be Used: Mblock 3 program, Pinoo control card, 1 red led module, 1 yellow led module, 2 dc motors, soil moisture sensor

Materials Required for Design: Forex, scissors and a utility knife, 2 propellers, silicone gun and silicone.

Project Preparation:
1. For our project, let's start by designing the dryer first.
 We cut 2 pieces of 15x10 cm, 10x20 cm, 20x15 cm from the forex.
 We create a platform by combining these parts.
 We open a hole where the cable of the soil moisture sensor can enter with a utility knife in the middle of the back of the platform.
 We pass the cable of the soil moisture sensor through the hole and silicon the sensor to the platform.
 We silicon the red led module to the left at the top of the platform and the yellow led module to the right.
 We silicon 2 propellers to the ends of dc motors.
 We silicon the dc motors at an oblique angle, facing the soil moisture sensor at the top of the platform.
 We attach the cables of the dc motors to the connection points, the red led module to the 2nd door, the yellow led module to the 1st door,
and the soil moisture sensor to the 7th door.
 We connect the USB connection cable to the pinoo card and to the computer.
Now we can start coding.
2.Adding Pinoo extension:
 From the Extensions tab, we click on the "Manage Extensions" option.

In the window that opens, we type "Pinoo" into the search engine and simply say download to the result.
It was installed on our computer.


We click on "Firmware Update" from the window that opens.
4. Coding part:

When the green flag is clicked, we constantly write the codes on the screen that will show the value of the soil moisture sensor attached to the 7th door.
Here we will see the value of 1023 in the first place. When we wet a paper towel and touch the soil moisture sensor, we will see that the values on the screen change.
 We add the "if not" structure from the control menu. We are writing our clause. The value of the soil moisture sensor attached to the 7.door should be less than 710, that is, it is wet.
 We add the "repeat until it" code block from the control menu and add our condition.
Our condition is ‘’If the soil moisture sensor attached to the 7.door is greater than 710, we will repeat it until the wetness reaches a dry value.’’

First, we run DC motors. Then we make the yellow LED turn off by making its status low.
 In order for the red LED to flash, we first make the status of the LED attached to the door high and wait for 0.2 seconds, then turn off the
LED's status by making it low and wait for 0.2 seconds.
 If not, we stop DC motors first.
 After stopping the DC motors, we turn the status of the red led attached to the second door low and turn it off. Then, we ensure that the yellow
LED attached to the 1st door is lit by making its status high.
 In order to load our codes to the Pinoo control card, we make the "Pinoo Program" command at the beginning of the event and delete the code we use to
display the soil moisture value on the screen.
 We right click on the "Pinoo Program" command and select the "Upload to Arduino" option in the window that opens.
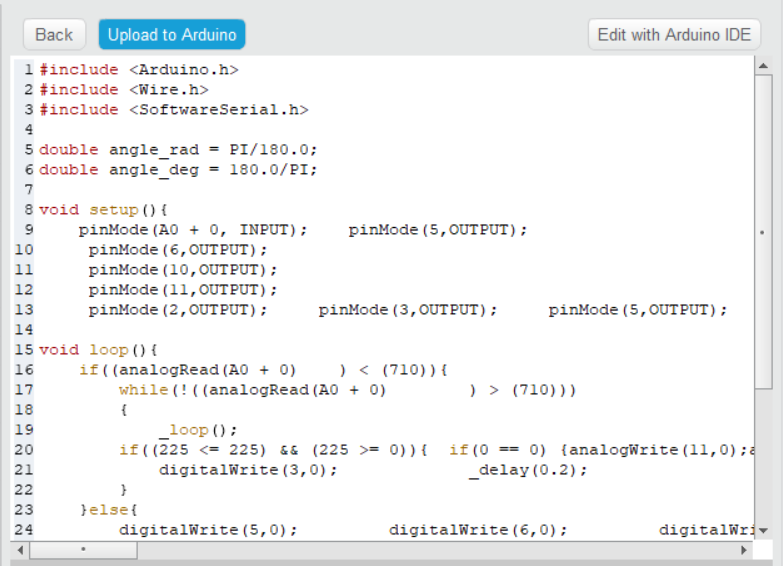 On the page that opens, we click the "Upload to Arduino" button selected in blue.
Our codes are uploaded to our Pinoo control card.

We click on the "Close" button after the "Download Finished" text appears.
5. Working Status of the Project:
 We are installing the 9V battery.

In the first place, only the yellow led will light.
When we put a wet towel on the soil moisture sensor, the DC motors will start and the red led will flash.