
Smart Shutter With Pinoo
Purpose of the Project: Using the Pinoo control card temperature-humidity sensor and servo motor, to make a system that will make a shadow when the temperature in the environment increases.
Duration: 2 lessons
Pinoo Set: Invention Set, Ful Set
Age Group: 9 years and over
Gains:
• Learns to code Pinoo control card.
• Learns to use temperature sensor.
• Learns to use servo motor.
• Improves the skill of setting up algorithms.
• Improves coding skill.
Materials to be used: Mblock 3 program, Pinoo control card, temperature-humidity sensor, servo motor, connection cables.

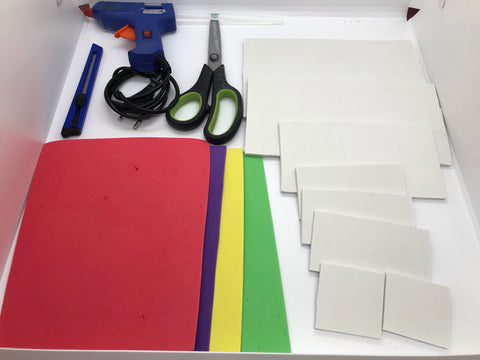
Materials Required for Design: Dekota, eva, scissors, utility knife, silicone gun and silicone.
Project Preparation:
For our project, we first set the decota parts.

We build the front of our cafe and cut a piece in a door view

We fix the piece we cut with the help of a silicone gun.

We cover the front of the cafe with eva.

We fix the cafe's sign in the front and write the name of our cafe with any pen.

We fix the rectangular piece of decota to be the front of the cage.


We cover the decota pieces that will form the walls of the cafe with eva.

We fix the decota pieces we covered as in the picture.

We fix a decota piece to the brush of our servo motor to support our shutter.

Then we fix our servo motor to the front of the cage with the help of a silicone gun.

We cover the decota part that will act as a shutter with eva and fix it to the brush of our servo motor.

Then we fix our temperature-humidity sensor as in the picture. We connect our temperature-humidity sensor to gate number 3 and our servo motor to gate number 2, to our Pinoo control card.
- Adding Pinoo extension:


From the Extensions tab, we click on the "Manage Extensions" option.
In the window that opens, we type "Pinoo" into the search engine and simply say download to the result.
It was installed on our computer.
- Connecting the Pinoo sensor board to the computer:

In Mblock 3, we click on the "Connect" tab on the upper left.

We click on the "Serial Port" section from the window that opens and select the "COM6" option from the page that opens.
NOTE: Since the port entries of each computer are different, the numbers next to the COM text may change.

We click on the Cards tab.

We select the "Arduino Nano" card option used by the Pinoo control card from the window that opens.

We click on the Extensions tab.

In the window that opens, we select the extension "Pinoo" of the sensor card we use.

We click on the Connect tab.

We click on "Firmware Update" from the window that opens.
- Coding part:

First, we place our temperature-humidity sensor identification code under the "Pinoo Program" code to check whether our temperature-humidity sensor is working. Then we print our temperature-humidity sensor values to the serial port and upload it to Arduino. Then we change the "recv encode mode" option to "capital state" at the bottom right of our mblock program. In this way, we see our temperature-humidity sensor values on the serial port. After uploading our codes to Arduino, let's not forget to reconnect from the program link connect section.

In order to check whether our servo motor is working or not, we add our start the servo motor code under the code when the key is pressed.

First, we create a variable called aci from the Data & Block section to ensure the slow motion of our shutter.

When the green flag is clicked, we cannot operate our temperature-humidity sensor under its code. Therefore, we are introducing our temperature-humidity sensor to our program with our code under the Pinoo Program code.

We ensure that our angle variable is 20 each time. Then we created the condition if the value of our temperature sensor is greater than 37 degrees.

If our condition is fulfilled, our angle variable will increase by -1 at 0.2 second intervals until our angle variable is 20, and our servo motor angle will change by increasing -1 each time.

If our condition is not met, our angle variable will increase by 1 at intervals of 0.2 seconds until our angle variable is 45 degrees, and our servo motor angle will change by increasing -1 each time.

We right click on the "Pinoo Program" command and select the "Upload to Arduino" option in the window that opens.
on the page that opens, we click on the "Upload to Arduino" button selected in red.

Our codes are uploaded to our Pinoo sensor card.
We click on the "Close" button after the "Download Finished" text appears. After the installation is finished, the battery compartment is inserted and the project is run.
- Working Status of the Project:

If the value of our temperature-humidity sensor is more than 37 degrees, our shutter will move up if not our shutter will go down.
ARDUINO IDE KODLARI:
#include <dht11.h> // dht11 kütüphanesini kodlarımıza dahil ettik.
#include <Servo.h>  // Servo kutuphanesi projeye dahil ettik.
int dhtPin=3; // Sıcaklık-nem sensörümüzün 2. pine bağlandığını belirttik.
dht11 sicakliksensor; // sicakliksensor adında bir DHT11 nesnesi oluşturduk.
Servo servomotor;  // Servo motor nesnesi oluşturduk.
int aci;//Servo motorumuzun açı değişkliğini yavaş yapması için aci adında sayısal veri tipinde değişken tanımladık.

void setup()
{
  servomotor.attach(2);//Servo motorumuzun hangi pine taktığımızı belirttik.

}

void loop()
{
  float sicaklik = sicakliksensor.read(dhtPin);//Sıcaklık- nem sensörümüzden aldığımız değeri sicaklik adında oluşturduğumuz değişkene aktardık.
  if(sicaklik>37)//Eğer sıcaklık değeri 37 dereceden büyük ise koşulunu oluşturduk.
  {
    for(aci=45;aci<=20;aci--)//Açımız 45 dereceden başlayacak ve 1'er 1'er azalarak 20 dereceye ulaşmasını istedik.
    {
      servomotor.write(aci);//aci değişkenimizin değerini servo motorumuzun derecesesine atamasını yaptık.

    }
  }
  else//Yukarıda oluşturduğumuz koşul sağlanmaz ise koşulunu oluşturduk.
  {
    for(aci=20;aci<=45;aci++)//Açımız 20 dereceden başlayacak ve 1'er 1'er artarak 45 dereceye ulaşmasını sağladık.
    {
      servomotor.write(aci);//aci değişkenimizin değerini servo motorumuzun derecesesine atamasını yaptık.

    }
  }
}