
Dishwasher With Pinoo
Purpose of the Project: Using the Pinoo control card, button module, temperature-humidity sensor and dc motor, our dc motor will start when we press the button, to make a system that stops the dc motor when the dishwasher overheats.
Duration: 2 lessons
Age Group: 7 years and over
Pinoo Set: Full Set.
Gains:
• Learns to code Pinoo control card.
• Learns to use temperature sensor.
• Learns to use dc engine.
• Learns to use button module.
• Improves the skill of setting up algorithms.
• Improves coding skill.
Materials to be used: Mblock 3 program, Pinoo control card, temperature-humidity sensor, servo motor, connection cables.

Materials Required for Design: Dekota, eva, scissors, utility knife, propeller, toothpick, silicone gun and silicone.

Project Preparation:
For our project, we first set the decota parts.

Since we will make a small dishwasher, we cut the decota pieces in those sizes with the help of a utility knife.

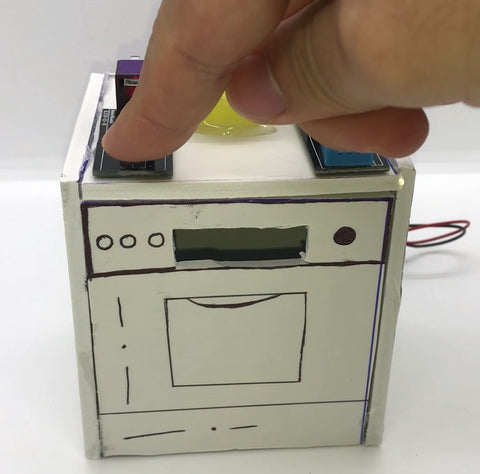
We cut the front cover of our dishwasher to see the propeller as in the picture.

We combine the decota parts with the help of a silicone gun as in the picture.

We use the toothpick to connect the dc motor and the propeller.

We make a cut on the top of our dishwasher so that the part that will turn our dc motor will go inside and fix it with the help of a silicon gun.

We open the hole with a utility knife as in the photo.

We fix our propeller to the dc motor with the help of toothpicks.

We fix our button module and temperature-humidity sensor on our dishwasher.
Then, we connect the button module to door number 1 and our temperature-humidity sensor to door number 2 to our Pinoo control card. We connect our Dc motor to our B1, B2 socket. In this way, we finish our design part.
Adding Pinoo extension:

From the Extensions tab, we click on the "Manage Extensions" option.

In the window that opens, we type "Pinoo" into the search engine and simply say download to the result.
It was installed on our computer.
Connecting the Pinoo control board to the computer:

In Mblock 3, we click on the "Connect" tab on the upper left.

We click on the "Serial Port" section from the window that opens and select the "COM6" option from the page that opens.
NOTE: Since the port entries of each computer are different, the numbers next to the COM text may change.

We select the "Arduino Nano" card option used by the Pinoo control card from the window that opens.

We click on the Extensions tab.


We click on "Firmware Update" from the window that opens.
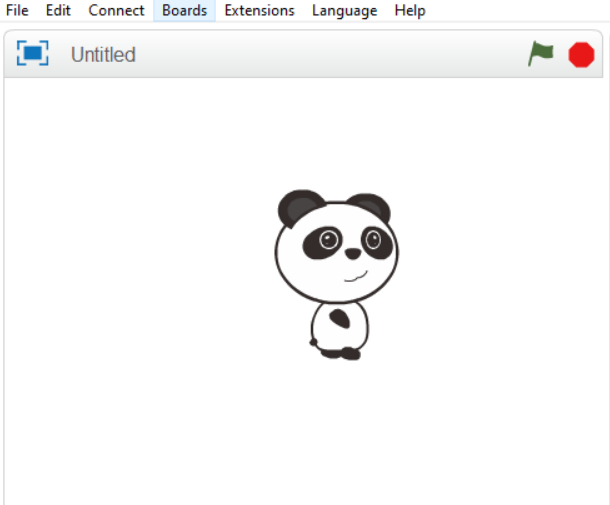
Coding part:

First, we place our temperature-humidity sensor identification code under the "Pinoo Program" code to check whether our temperature-humidity sensor is working. Then we print our temperature-humidity sensor values to the serial port and upload it to Arduino. Then we change the "recv encode mode" option to "capital state" at the bottom right of our Mblock program. In this way, we see our temperature-humidity sensor values on the serial port. After uploading our codes to Arduino, let's not forget to reconnect from the program link connect section.

In order to check if our dc engine is running, we add our Pinoo bot run code under the code when the green flag is clicked.

In order to check whether our button module works or not, we run our button arrow code in the green flag code.

We write our codes under the Pinoo Program event. We are promoting our temperature-humidity sensor. Then, if our button state is equal to 1, we run our dc motor at 255 rpm until the value of our temperature sensor is greater than 35 degrees. If the button is not pressed, we make our dc motor passive by adding the Pinoo bot stop code.

We right click on the "Pinoo Program" command and select the "Upload to Arduino" option in the window that opens.

On the page that opens, we click on the "Upload to Arduino" button selected in red.
our codes are uploaded to our Pinoo control card.

We click on the "Close" button after the "Download Finished" text appears. After the installation is finished, the battery compartment is inserted and the project is run.
Working Status of the Project:
Our propeller will start to rotate when we press the button. If the value of our temperature-humidity sensor is more than 35 degrees, our dc motor will stop.
ARDUINO IDE CODE:
#include <dht11.h> // dht11 kütüphanesini kodlarımıza dahil ettik.
int dhtPin=2; // Sıcaklık-nem sensörümüzün 2. pine bağlandığını belirttik.
dht11 sicakliksensor; // sicakliksensor adında bir DHT11 nesnesi oluşturduk.
int buton=3;//Buton modülümüzü hangi pine taktığımızı belirttik.
int butondurum=0; //Butona basılı mı değil mı diye kontrolünün tutulması için butondurum adında int türünde 0 değerinde bir değişken oluşturduk.

void setup()
{
  pinMode(buton, INPUT);// Buton modülümüzün giriş birimi olduğunu belirttik.
  pinMode(dhtPin, INPUT);//Sıcaklık-nem sensörümüzün giriş birimi olduğunu belirttik.
  pinMode(10,OUTPUT);//Dc motorumuzun pinoo kontrol kartında sol taraftaki B1,B2 dc motor soketinin karşılığı arduinoda karşılığı 5 ve 6. dijital pin olarak ayarladık.
  pinMode(11,OUTPUT);
}

void loop()
{
  butondurum=digitalRead(buton);//Buton modülümüzün okunan değerleri, butondurum değişkenine aktardık.
  float sicaklik = sicakliksensor.read(dhtPin);//Sıcaklık- nem sensörümüzden aldığımız değeri sicaklik adında oluşturduğumuz değişkene aktardık.
  if(butondurum==1)//Eğer buton modülümüden aldığımız değer 1'e eşit ise koşulunu oluşturduk.
  {
    digitalWrite(5, HIGH);// Eğer şart sağlanırsa dc motorumuz çalışmasını söyledik.
    digitalWrite(6, LOW);

  }
  if(sicaklik>35)//Sıcaklık sensöründen aldığımız değer 35 dereceden büyük ise koşulunu oluşturduk.
  {

    digitalWrite(5,LOW);//Dc motorumuz pasif hale getirdik.
    digitalWrite(6,LOW);
  }
}