
Bridge With Pinoo
Project Purpose: To make a bridge project by using distance sensor and servo motor with Pinoo control card.
Duration: 2 lessons
Age Group: 7 years old and above
Benefits:
• Learns to code Pinoo control card.
• Learns to use distance sensor.
• Learns to use servo motor.
• Improves the skill of setting up algorithms.
• Improves coding skill.
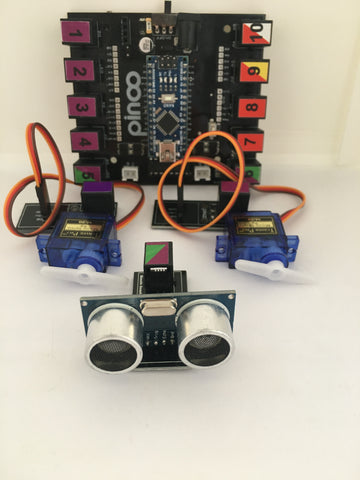
Required Materials: Mblock 3 program, Pinoo control card, 2 servo motors, 1 distance sensor.
Materials Required for Design: Large forex, scissors and a utility knife, colored cardboard, silicone gun and silicone.

Project Preparation:
1. For our project, let's start with designing the bridge.

We cut 1 40x20 cm and 2 20x10cm pieces from the forex.
Let's use a utility knife to cut it. You can cross it a few times and cut it.
 We silicon the 2 pieces in the middle of the big piece at a distance of 30 cm between them. There will be pillars of the bridge.
 We cut 2 small pieces from the forex.
 We silicon the parts we cut in a way that is opposite to the middle points of the poles.
 We remove the ends of the servo motors and silicon them in opposite ways.
 We silicon the distance sensor in front of one of the poles.
 We install the connection cables of the distance sensor and the servo motor.
 Servo motors 1 and 2. We install the distance sensor on the door 5.
 We cut two 15x5cm strips from colored cardboard.

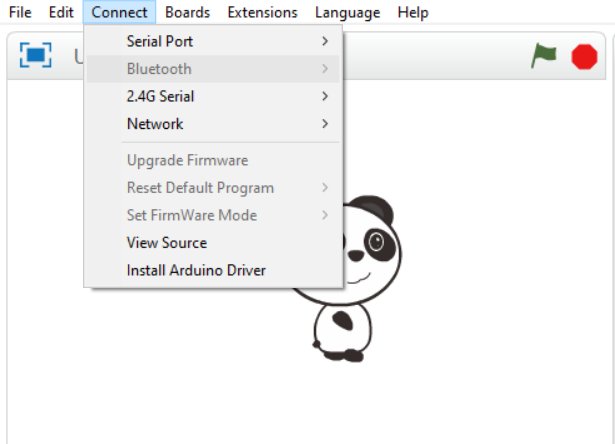
We connect the USB connection cable to the Pinoo control card and to the computer.
We will install the ends of the servo motor after adjusting the angles in the coding section.
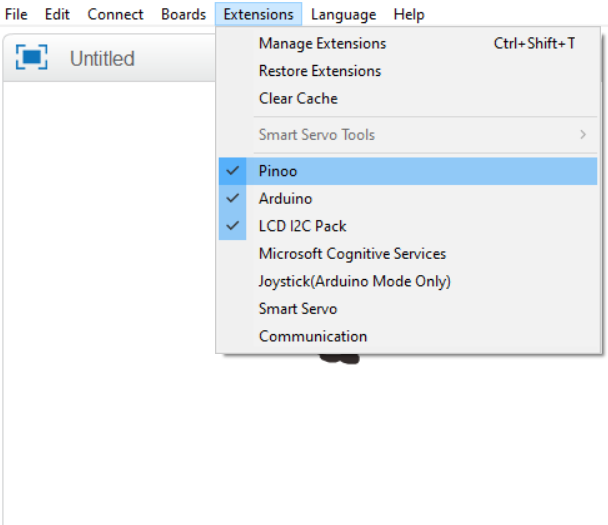
2.Adding Pinoo extension:
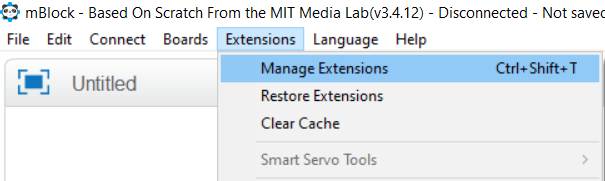
From the Extensions tab, we click on the "Manage Extensions" option.
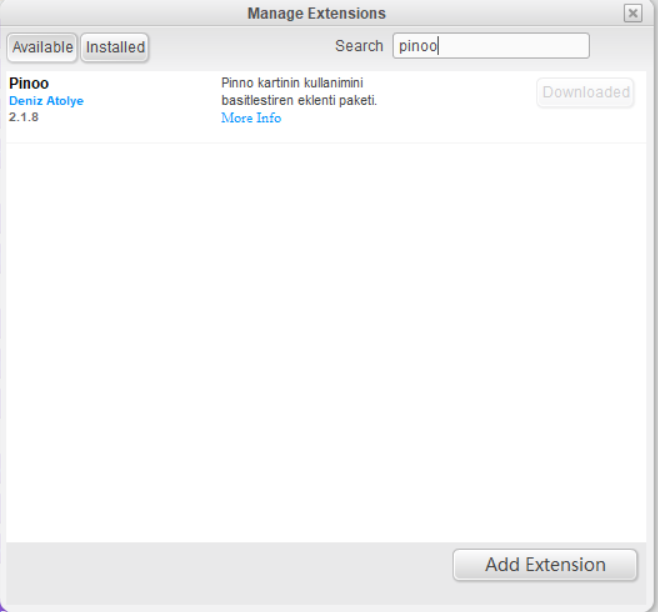
In the window that opens, we type "Pinoo" into the search engine and simply say download to the result.
It was installed on our computer.


4. Coding part:
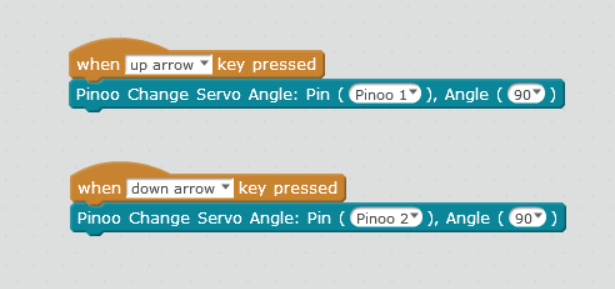
We make the angles of the servo motor 80 degrees by using the up and down arrow keys.
 We insert the ends of the servo motor straight up. We silicon the colored cardboard pieces that we cut on top.
 When the green flag is clicked, we are constantly writing the necessary codes to show the distance value on the screen.
 By adding the "If not" condition block, we write our condition that the value read by the distance sensor attached to the 5. door is less than 20.
 If our condition is correct, we make the angle of the servo motor mounted on the 1. door 0 degrees. We hold it for 0.1 seconds. We set the angle of the servo motor attached to the door 2 to 0 and wait for 3 seconds. The bridge will be opened.
 If our condition is not correct, we make the angle of the two servo motors 80 degrees in 0.1 second intervals. The bridge will be closed.
 In order to upload our codes to the Pinoo control card, we make the "Pinoo Program" command at the beginning of the event and delete the code block we use to display the distance value on the screen.
 We right click on the "Pinoo Program" command and select the "Upload to Arduino" option in the window that opens.
 On the page that opens, we click the "Upload to Arduino" button selected in red.
Our codes are uploaded to our Pinoo control card.

We click on the "Close" button after the "Download Finished" text appears.
5. Working Status of the Project:
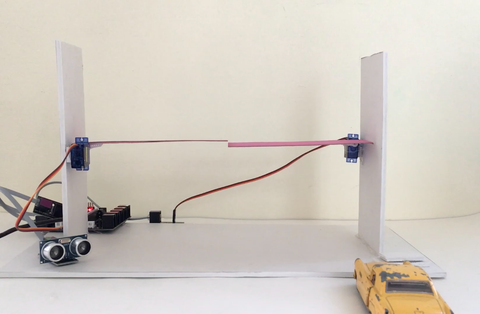 Our project will look like this in the first place.
 When the distance sensor detects the car, the bridge will open.
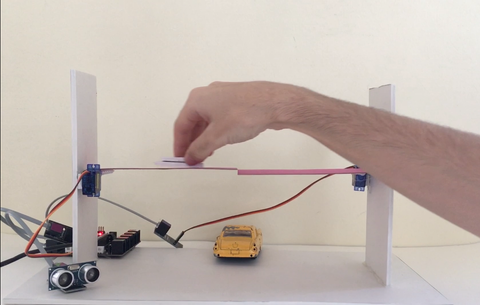 After a while, other vehicles will be able to pass through the closure and the bridge above.
WITH PINOO SETS, CHILDREN CAN DO HUNDREDS OF PROJECTS WITH MATERIALS THAT CAN COMFORTABLY AT HOME.