
Smart Sink with Pinoo
Purpose of the Project: To create an alarm system with a water sensor and buzzer module to protect from floods using the Pinoo control card.
Duration: 2 lessons
Age Group: 9 years and older
Pinoo Set: Basic set, invention set, maker set and full set
Benefits:
- Learns to code the Pinoo control card.
- Learns to code the water sensor module.
- Learns to code the buzzer module.
- Algorithm building skill develops.
- Coding skill improves.
Materials to be Used: Mblock 3 program, Pinoo Control Card, Water Sensor, Buzzer Module, Connection Cables
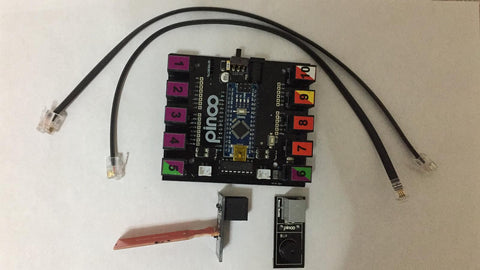
Materials Required for Design: Pet bottle, silicone gun, scissors, toilet paper roll, colored cardboard, paint, tongue stick

Project Preparation:

Cut the PET bottle from the cap to look like a funnel.
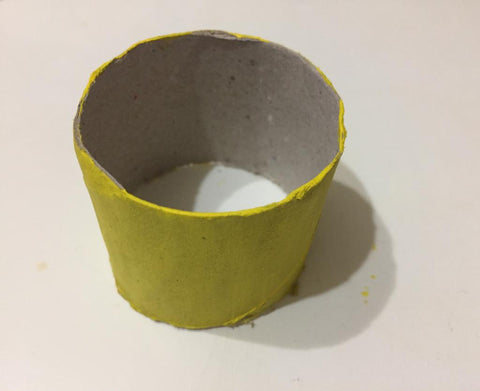
We paint the toilet paper roll. We reduce its height by cutting it.

We place the funnel on the open part of the roll and fix it on the floor.
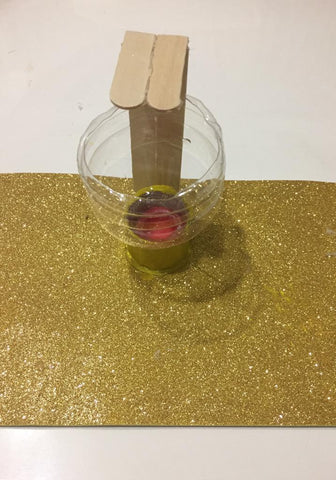
We design taps from tongue bars and place them on the floor.


We fix the water sensor next to the faucet and the buzzer module behind it.
Our connections should look like this:

We pay attention to the color on the module for our water sensor connection. We make our connection to pin 8 from the red inputs, which have the same colors, on the Pinoo card.
For the buzzer module connection, we pay attention to the color (purple) on the module. We connect to pin number 1 from the purple inputs that have the same color on the Pinoo card.

We have completed the connections and the design of the project. You can decorate the design as you wish.
Connection and Coding:

Now let's move on to the coding part. We will use the mblock-3 application for this.

Let's connect our Pinoo Control Card to the computer with the help of a connection cable and enter the Mblock3 application. Then, let's introduce our Pinoo Control Card to the computer. To do this, we first click on the serial port option from the Connect tab. Then we select COM3. (The number may differ depending on the computer and the port.)

After making the serial port connection, let's select the card we will use from the cards tab. We are working with Arduino Nano model.

In order to add the Pinoo extension to our computer, we click on the manage extensions option from the extensions tab. In the window that opens, we write "Pinoo" in the search engine and click download to the result. It has been installed on our computer.

After selecting our card, we click on the Pinoo option from the Extensions tab. We will write our codes with the Pinoo extension.

In the coding part, we get the code when the Green Flag is clicked from the Events menu to start the application.

To see the value of the water sensor on the screen, we get the code Hello from the View menu. We get the code that will read the value of the water sensor from the ‘robots’ menu. We choose the port number to which we connected our sensor.

In order to see the value read by our sensor continuously, we take the repeat code from the control menu and place the other codes in it. We observe the values that our puppet reads from the sensor by dropping water on it and drying it.

After completing our codes regarding the water sensor, let's move on to the codes of our buzzer module, which we use to warn during the flood. First, let's get the code required for the buzzer to make a sound from the Robots menu and select the port number it is connected to.

When the water overflows from the sink, the buzzer will give an audible warning, if the water will not overflow from the sink, it will not give a warning. We need conditional statements to make this system. If not, from the control menu, we get the code into the repeat code continuously.

If the value read by our water sensor is greater than 400, that is, the amount of water above the sensor is increasing, the buzzer gives an audible warning if there is a flood. If it is less than 400, the buzzer should not give any warning. For this, we place the size operation from the operations menu, if not, into the code.

Then we enter the code that reads the value of the water sensor on the left side of the transaction and add the number 400 to the right.

If the value of the water sensor is greater than 400, we add the buzzer silence code to the relevant place so that the buzzer does not give a warning.

After completing our codes, we check the operation of our project by clicking the green flag. While the sensor was initially dry, our dummy showed a value less than 400 and the buzzer did not give any warning. When we drop a few drops of water on the sensor, the buzzer warns against the risk of water flooding.

If there is no problem in the operation of our project, we need to load the codes we have written into our card in order to run our project with a power source independent of the computer.
For this, we throw away the "Click on the green flag" code we used at the beginning and the code that we made the puppet tell the sensor value, and get the Pinoo Program code from the Robots menu.

Right click on the code and click Upload to Arduino. (We work with Arduino as a board.)

We are waiting for the codes to be uploaded to the card. After the installation is complete, we close the window and disconnect the Pinoo control board connection cable from the computer.

We power our Pinoo control board with the help of a 9v battery and a battery cap. We also turn the on / off button right next to the battery input to the on position.